Showing posts with label quilting. Show all posts

Thursday, January 24, 2019

I had joined a swap last year. It was done through Margaret Leuwen Quilting; "The Half Square Triangle Swap."  The pattern is called Free Spirit from https://www.laundrybasketquilts.com. I have some of the blocks done and some I am still working on.
 We would use the triangles on a roll paper to sew these small ones.   I would put two fat quarters pretty side facing and pinned the paper onto the fabric.  Stitching on the lines would help the seams be more accurate. Which as we all know, is 1/4". After all the sewing is done we would then cut them out and this is what you have in the end of that process.

After I took all the papers off, I pressed the seams opened because of all the little seams.  I used a very short stitch length so they would not pull apart easily.
After that I would follow the directions to piece them together.

These larger HST were also done in the same manner. After sewing on the paper and cutting them apart, I would remove the paper and press the seams to the dark side.
The colors in these HST are really pretty. These pictures do not do them justice.
This is not a very large quilt, but large enough for me.  Not sure how I will quilt it when it is finished.

I will post more pictures as I progress on this project. This is one quilt I want to finish before the year is over.  Wish me luck on that! I am going to need it!
"Do something creative everyday, it will feed your soul."

Large Quilt Blocks

       Would you like to see what I have been working on?  You know my hobbies? Well yes, I know I have been away for a very very loooong time.  My apologies.  I have been very hmmmm busy, sort of. And sometimes not so busy. Okay, no excuses really.  I have some pictures of a couple of large quilt blocks I have been working on since Jan. 2019.  I am doing a block of the week with Pat Sloan.  Not sure I will do all the blocks as they come out but the ones I do I will post a picture. I have an idea of a wall hanging I want to do with one of the blocks. I am still mulling it over.  I'll fill you in when I figure it out for sure.
     
 This is the first block I thought it came out quit good.  I was surprised at how nice my points are.  I had been having problems with my light weight brother.(I think I wore it out over the last few years).  My sister (bless her) she loaned me one of her light weight brother machines and now I can sew much straighter lol. 
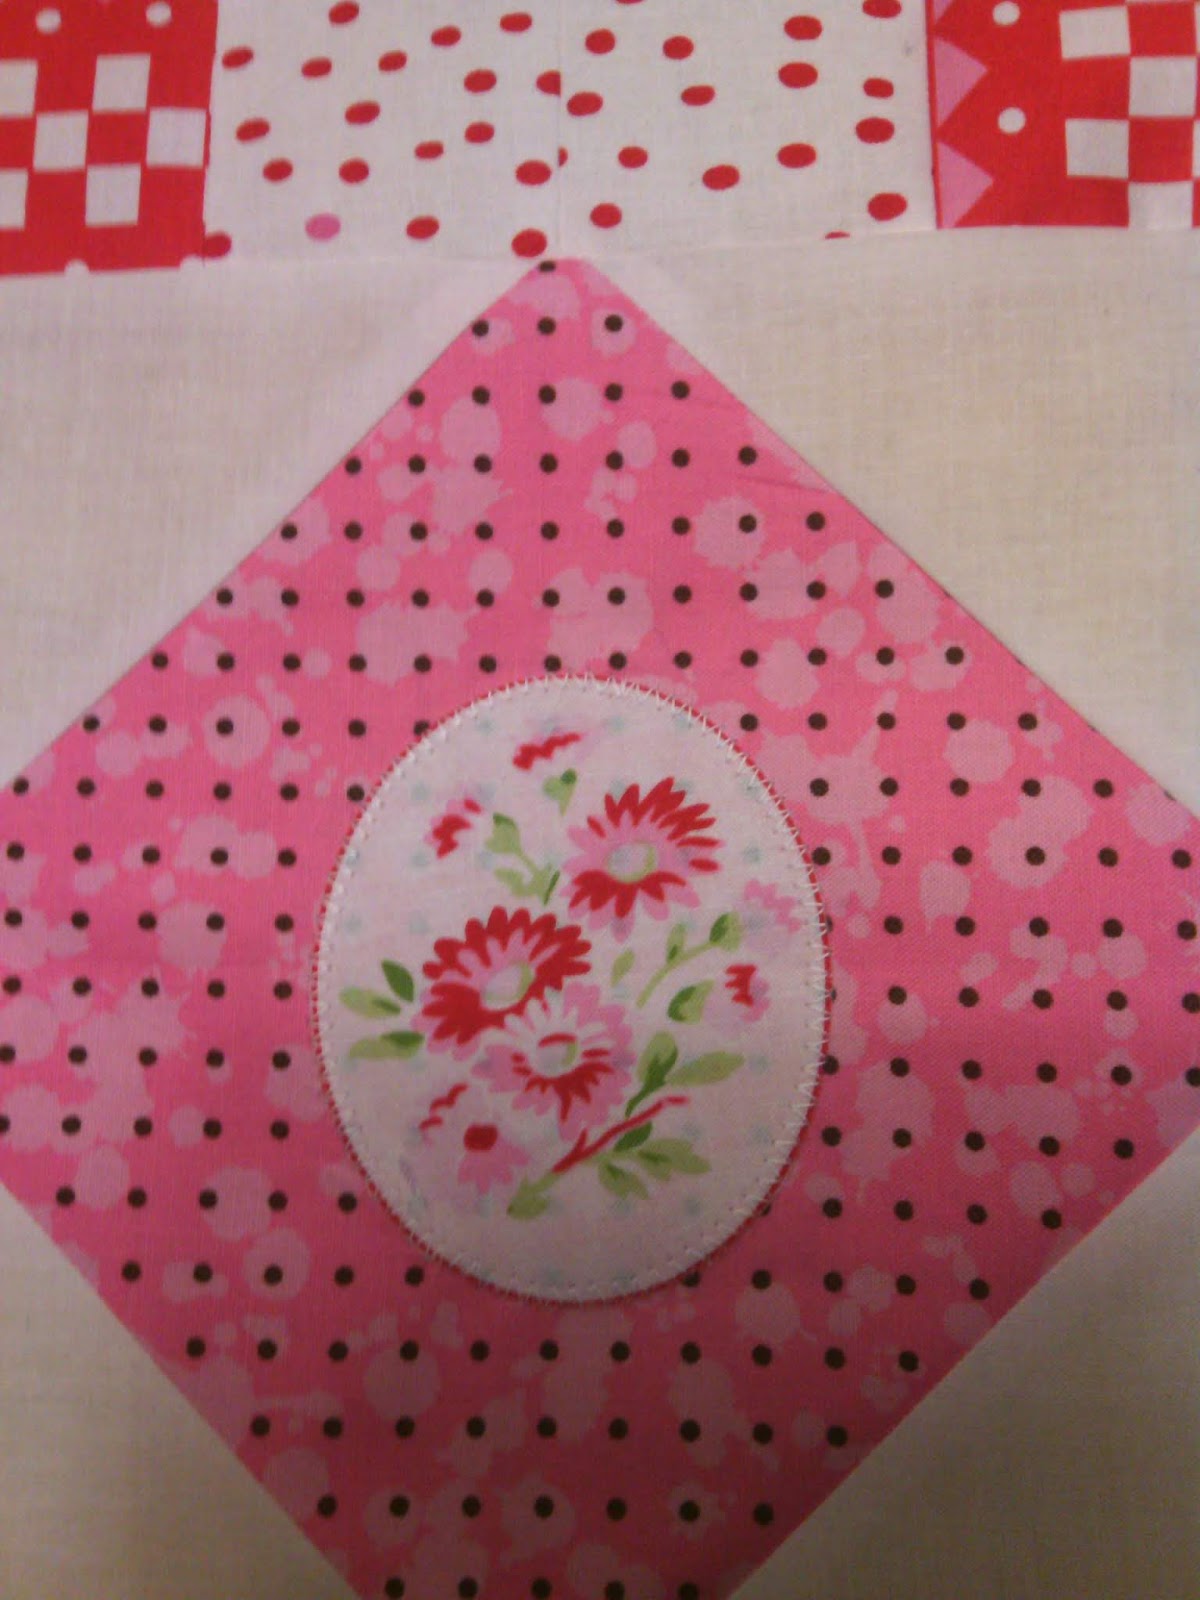
 This is another block which I am really quit proud of.  Not bragging, just estatic about how nice it looks.  My center block, ironically was not suppose to have perfect points.  For some reason I got on point great the others not so great, but none of them looked like the pattern ha go figure. the thing about this block is how I fussy cut the oval shape with the flowers in the middle and then I appliqued it onto the on point square.
It is difficult to see, but I did a zig-zag around it in white.  I am wanting to do more with the applique Maybe a wall hanging; like I mentioned above. 

Tell me what you think in the comment section below.


Thank you so much for visiting my happy place. Please come again.

Wednesday, April 26, 2017

Mug Mats For Home, Office, Any Where

Hello, and welcome to Patty's Happy Place!  Here is where I post my favorite crafts; sewing/quilting and crochet, and maybe other crafts. I will be posting tutorials related to my projects here. 


Doing tutorials are new to me, so my first projects may be familiar to you. Okay, enough about that, let's get started on my first project tutorial! 

Mug Mats
A great fat quarter project. or you can use your scraps!
Front and back view They are approximately 4 1/2 inches square.


Here is what you need to make your own.

1. sewing machine and thread. (you can sew these by hand, if you wish).
2. cutting mat and rotary cutter
3. ruler
4. pins
5. iron and pressing mat
6. spray starch (optional)
7. three different but coordinating fabrics. I used three fat quarters and yardage for my hidden fabric.  you can also use up scraps. 
8. batting (I used 100% cotton batting, low loft.)


Cutting Directions:(Press your fabric before cutting)

1. Batting - six 5" squares
2. Patchwork top - twenty four 5" squares:
    twelve of one color or print
    twelve of another color or print
3. Bottom - six 5" squares
4. Hidden square - six 5" squares eg. muslin
I folded my fabric up to four layers. Line up the fold on a grid line, then make a straight edge and cut off the selvage, before cutting your 5" strips.
After you cut your strips, measure and cut strips into 5" squares. From each fat quarter I was able to get three 5" strips, which gave me twelve 5" squares.
After cutting your strips into 5" squares, you will need twelve solid, twelve poke-a-dots, and six of another print. I forgot to add my hidden squares (six), but I used white.  And of course don't forget the six batting 5"squares.
I pressed my solid and poke-a-dot pieces in half with wrong sides together. Please excuse my pressing pad, I need to put a new cover on it.  eew! That's what happens when you use starch, I think. 
Okay, now let's start assembling our mat.  First I take a batting square, 
add the "hidden" piece on top of the batting and flip over so batting is at the top.
Add the other print on top of the batting and leave it the way it is.
Lay your first print on top of the square. make sure the fold is toward the center of the square.

continue laying the folded fabrics until you have four on the top that alternate from solid to print. It will look like a four patch.
 When you lay the last piece on, you will need to pull up the first piece, where it has not been pinned yet. Then put the solid piece under the poke-a-dots and pin.  
Starting away from a corner, sew all around your square using a 1/4" seam.  Make sure you sew a little over your starting point to lock the stitches in.
 Snip the corners, but not your stitching and pull out the pins.

Now you can turn it right side out and press. You now have a mug mat. Continue with the remaining squares so you can have a set of six matching mug mats. 

I hope you enjoy making these fun mug mats.  You can find many videos on making these, on You tube. Here is one of them. Gourmet Quilter.

If you have found an error in my directions, please let me know so I can correct it.  Thank you.

Thank you for stopping by.